Showing posts with label Home Make Overs. Show all posts

Monday, October 10, 2011

Finding Inspiration

Finding inspiration can be hard at times.  You get busy with your family and it seems like everything else stops.  I recently decided that I wanted to go back to finding the things I love and doing them when time allows.

I used to love going to antique stores and flea markets.  Find that one really cool find and making it over into something amazing.  Last weekend I really wanted to decorate my front porch area to make it more inviting.  So I took off to Hobby Lobby {my favorite store} and found lots of fun and cute things.  I left Hobby Lobby empty handed because it wasn't what I was looking for.  I wanted something quaint and different.

  Something inspiring. 

I decided to stop in at a flea market in town and browse quickly through it to see if there were any goodies there.  I found something that set my mind spinning!  I found a baby doll cradle that was so cute.  Even if the color wasn't what I was wanting I still had high hopes!  I checked it out to make sure it was sturdy enough and it was.  Now, I wonder what it's price would be??  I was almost too scared to look!

$9.99.

Can you believe it!?!  I couldn't.  I snatched that bad boy up and left happy!! 

The idea I had for this cradle is simple.  I wanted to use it as a flower planter for my front porch.


So instead of having a screaming red baby cradle, I stopped by Menards and grabbed 2 cans of Chestnut paint.  Perfect!

Added to my list were 3 gallon sized yellow mums with a little hint of red in them.

After spray painting my cradle a beautiful chestnut color, it sat a day or two to dry.

Next....

Accessorize it.

I really didn't have a big plan in mind.

I picked up some leaf branches at JoAnns and attached them to the side posts with floral wire.

Added a little raffia.
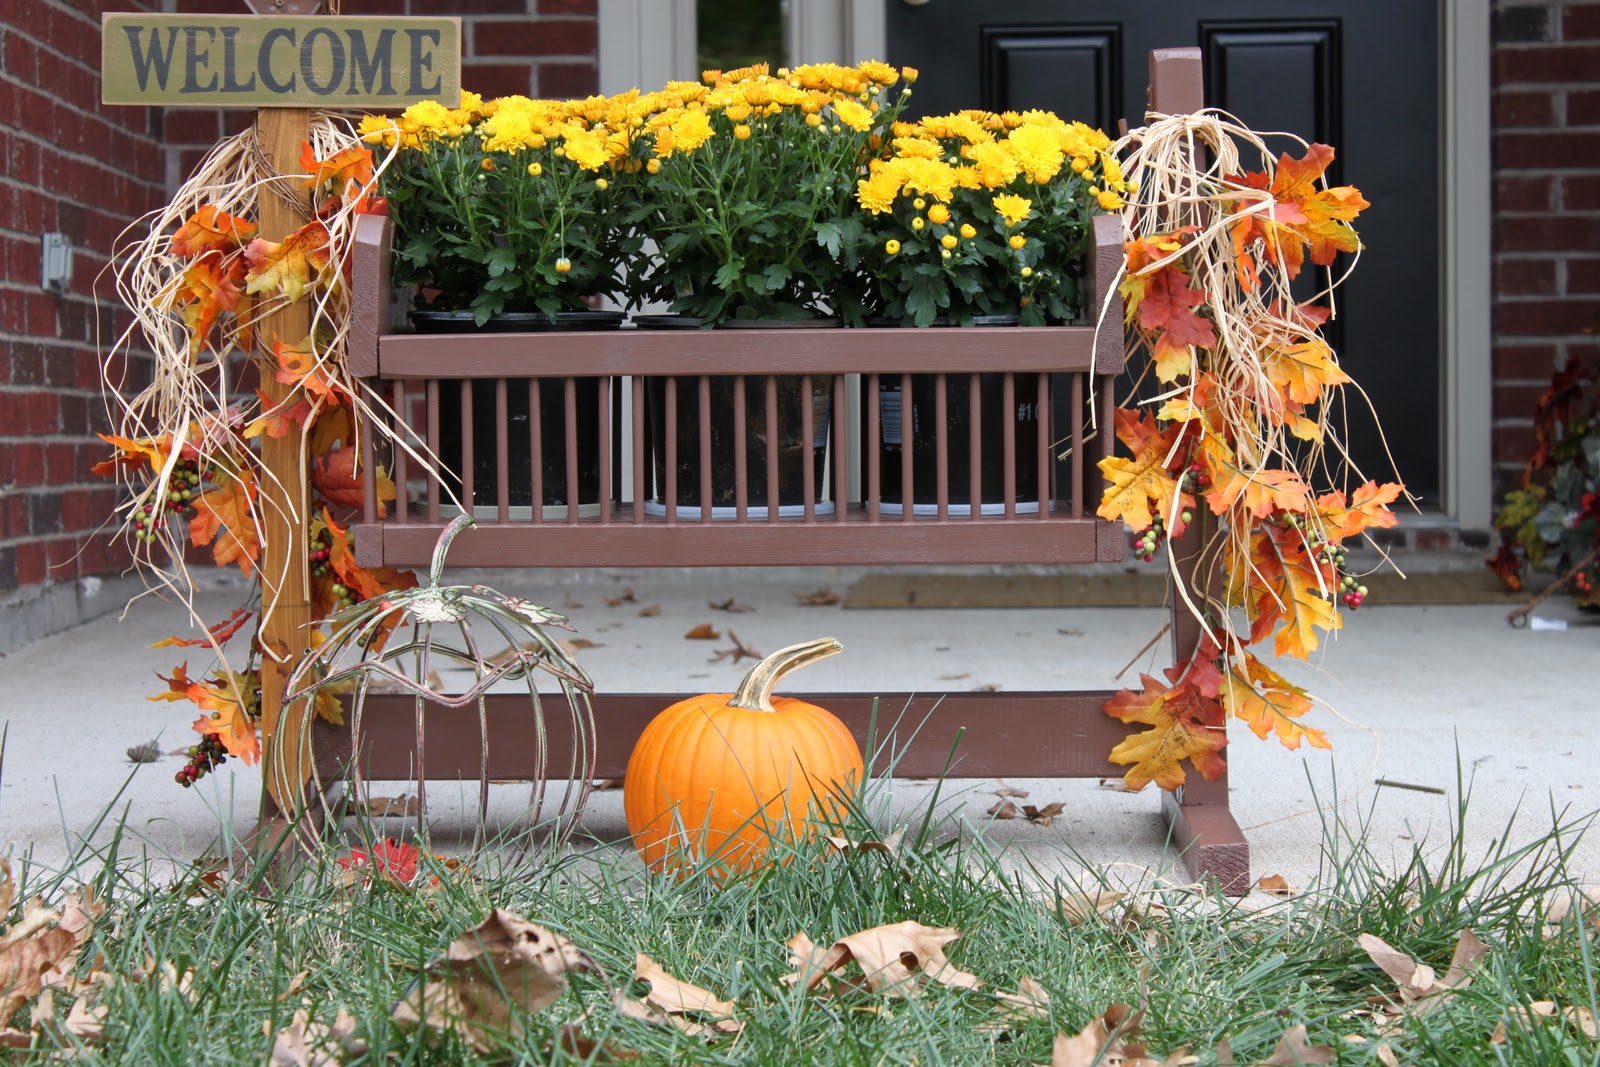
It didn't seem complete so I added a little rake "Welcome" sign to the left side and attached it with floral wire in 3 different place.


While I would like to add more props around my cute little planter, I am stopping for now until I find the next great steal. 

It's easy to get stuck in a rut of creating new things.  My encouragement is this.  Find what you LOVE.  Look around at Flea markets and ask yourself how you could re-do something into something really amazing.  Pick up a few accessories that go well with it and pull it together with things you might all ready have.  You'll be amazed at the end product!

It is the planter I didn't know I was looking for!

Happy creating!


*Linked to

Thursday, November 11, 2010

Americana Rag Potholder

Gift wrap your gift. 
Tie from rag potholder is included in your purchase.


I remember not too long ago how I thought that home made pot holders were just not as good.  I was dead wrong!  My husband's grandmother has given me some of the BEST crocheted pot holders I ever had.  Plus my mother gave me some pretty ones too when I got married 7 years ago.  She made a rag quilt pot holder out of sunflower material.  It still works great even 7 years later! 

This last week or so I got to thinking that I really wanted to make some pot holders.  Who couldn't use those?  It seems like the ones I have are looking old so I looked around to see if I had any material I could use.  I only had one piece that I thought would work.  It was a deep red Americana fabric with tan stars.  Since I didn't have an accent color to go with it, I researched making pot holders on-line.  What I found was a beautiful Rag Pot Holder that was just beautiful.

Here's all you need to do:

  • Step 1.  You'll need about 3/4 yard to 1 yard of cotton material.
  • Step 2  Cut 3/4" strips of fabric.  I recommend cutting them to make the longest strip you can.  You will be sewing a lot if you don't.
  • Step 3.  Take each strip and sew them together using a bias edge so that the fabric will lay flat.
  • Step 4  Crochet!  I can definitely do that!

I did not have a pattern, but based my measurements off a potholder I have.  Once I got the length I wanted, I just crocheted away.  The fun part....  Keeping my 4 month old from grabbing it as I crocheted.  I think he just wanted to play!


But who doesn't love Americana Decorations?  Such a wonderful way to brighten your kitchen.  Good potholders that last are hard to come by.  I think most of the ones I have are homemade and they last a long time!


Psst..... 
Great Gift idea for any Holiday, Birthday, Special Occasions, a Young Ladies Hope Chest, a teacher or for yourself!  Discounts given to customer who purchase in quantities of 4.  Email me for details!

See my store for more rag pot holders to come!  Let me know what colors your kitchen are and I will make them match!


Tuesday, October 26, 2010

Home Makeover Edition #3-Table Runner and Placemats


Fall is one of my favorite times of the year.  In fact, our tree in front of our house is a gorgeous fall color.  It's a Autumn Blaze Maple tree and we adore it!  We used to have two of them, but one blew down this summer in a storm.  It's been sadly missed.


With all that amazing color outside my house, I started wishing I could bring it into my home.  It was then I remembered I had a beautiful Fall table cloth that I picked up at a garage sale 5 or 6 years ago.  I meant to use it but it somehow never did.  I decided to pull it out and give it a new life.  Why not make it into a table runner and place mat set for my dinning room? 

After going on-line and viewing how to make a place mat, I decide to get started.  I needed to make 4 placemats and 1 table runner.  My goal was to remake this table cloth into something glorious for $0.00.  My supplies I had on hand were:

1 King Size Pillow Case
1 Table Cloth
Thread to Match
Sewing Macine
Iron
Rotary Cutter
Cutting Mat
Plactic Ruler
Scissors

Part of my supplies.

First I cut my pillow case into (4)  19" X 15" rectangles using my rotary cutter and plactic ruler.  Since I didn't cut my pillow case apart before hand, it all ready had two layers of material to cut through.  This way  I only had to cut two rectangles to size. 

I then cut my table cloth long ways into (4) 19"X15" rectangles.
This way I would have enough left over to make my table runner.

Since the Fall table cloth frayed a little, I went ahead and stitch 1/4" in to help stop the fraying.  I then pressed the raw edges 1/2" in towards the wrong side.

Match both fabric pieces together making sure they match up and pin them securely together.


I stitched about 1/4 " in on the first round and then stitched another round
 to add some extra decorative interest.

One of the finished place mats.

Before. . . .

After....
I only had to stitch one edge of the table cloth since the other side still had its seem intact.
I added my table runner to the buffet and a basket to keep all our papers in it.
Now it looks nice and neat.

How much did this cost?  Not a dime.  I used something I all ready had and just made it over!

Saturday, October 23, 2010

Home Maker Edition #2-Glass Snowman

This week I want you to LINK UP and show me what projects you created without spending a dime.

Do you have things that sit around your home that you have no idea what to do with?  We do!  I know that it can sometimes be hard to get out there and just buy new things to decorate your home.  So this week I have been taking notes on things I want changed.  I put on my crafter's eyes and looked at things in a different light.  Things that I hadn't changed in years now took on a different glow because I am pulling things out of the closet and using them.  I am taking other decorative items and switching it out in a different location.  I am dressing it up.  ALL without spending a dime!  Don't you love that?  Sometimes we feel like we have to go spend money just to make something look nice.  I challenge you this week to look at your home through different eyes this week.  What can be changed without spending a dime?  What items can you use to make something creative? 

Drab...

One of the items I am showing you today is something I didn't have to spend a dime on.  My husband had this glass snowman that someone had given him MANY years ago.  {I won't say how old or what food item was in it!}  We were looking through some of his stuff from his old bedroom at his parents place and found a cute glass snowman. Once we cleaned it out, I wasn't for sure what I really wanted to do with it.  Soooo.. it sat on my kitchen counter for a long time.  Until, I got the idea to dress it up a little.  I decided to crochet a little black hat and add a little ribbon to him. 


To Fab...

I added cottonballs to him to make him look more wintery.
But... wouldn't he look nice with some peppermint candy in him for Christmas?

I have another great idea that I am going to show you next week. I didn't spend a dime on it either. I just used what I had.....

Thursday, October 21, 2010

Home Makerover Edition #1-Sandstone Walkway

I wanted to show you how easy it is to put together a walkway.  It can be fairly inexpensive too, if you know were you can get rock inexpensively.  We were fortunate enough that my mom was getting rid of her sandstone.  Every time we visited her we picked out stones to bring back home.  The stones were found along my parents creek, but you can find these stones along river beds or creeks.  If you know someone who doesn't mind you pulling them out, you can cut down on your cost of making a walkway.

First we laid out the stone on the ground next to where we wanted to build our walk way. 
My husband then measured the width and dug out the dirt.

Next we added a black border to keep the grass from growing into the walkway.
Sand was added next and packed down.
Once you get the sand packed down,
we added our stone and leveled it out as we went along.

Last step, add pebble rock to finish the look.
Locking sand can be added to keep the pebbles secure.
We haven't done that yet.
We wanted to wait and see if we needed it.

After a rinse off, we are very pleased with the outcome!