Finding inspiration can be hard at times. You get busy with your family and it seems like everything else stops. I recently decided that I wanted to go back to finding the things I love and doing them when time allows.
I used to love going to antique stores and flea markets. Find that one really cool find and making it over into something amazing. Last weekend I really wanted to decorate my front porch area to make it more inviting. So I took off to Hobby Lobby {my favorite store} and found lots of fun and cute things. I left Hobby Lobby empty handed because it wasn't what I was looking for. I wanted something quaint and different.
Something inspiring.
I decided to stop in at a flea market in town and browse quickly through it to see if there were any goodies there. I found something that set my mind spinning! I found a baby doll cradle that was so cute. Even if the color wasn't what I was wanting I still had high hopes! I checked it out to make sure it was sturdy enough and it was. Now, I wonder what it's price would be?? I was almost too scared to look!
$9.99.
Can you believe it!?! I couldn't. I snatched that bad boy up and left happy!!
The idea I had for this cradle is simple. I wanted to use it as a flower planter for my front porch.

So instead of having a screaming red baby cradle, I stopped by Menards and grabbed 2 cans of Chestnut paint. Perfect!
Added to my list were 3 gallon sized yellow mums with a little hint of red in them.
After spray painting my cradle a beautiful chestnut color, it sat a day or two to dry.
Next....
Accessorize it.
I really didn't have a big plan in mind.
I picked up some leaf branches at JoAnns and attached them to the side posts with floral wire.
Added a little raffia.
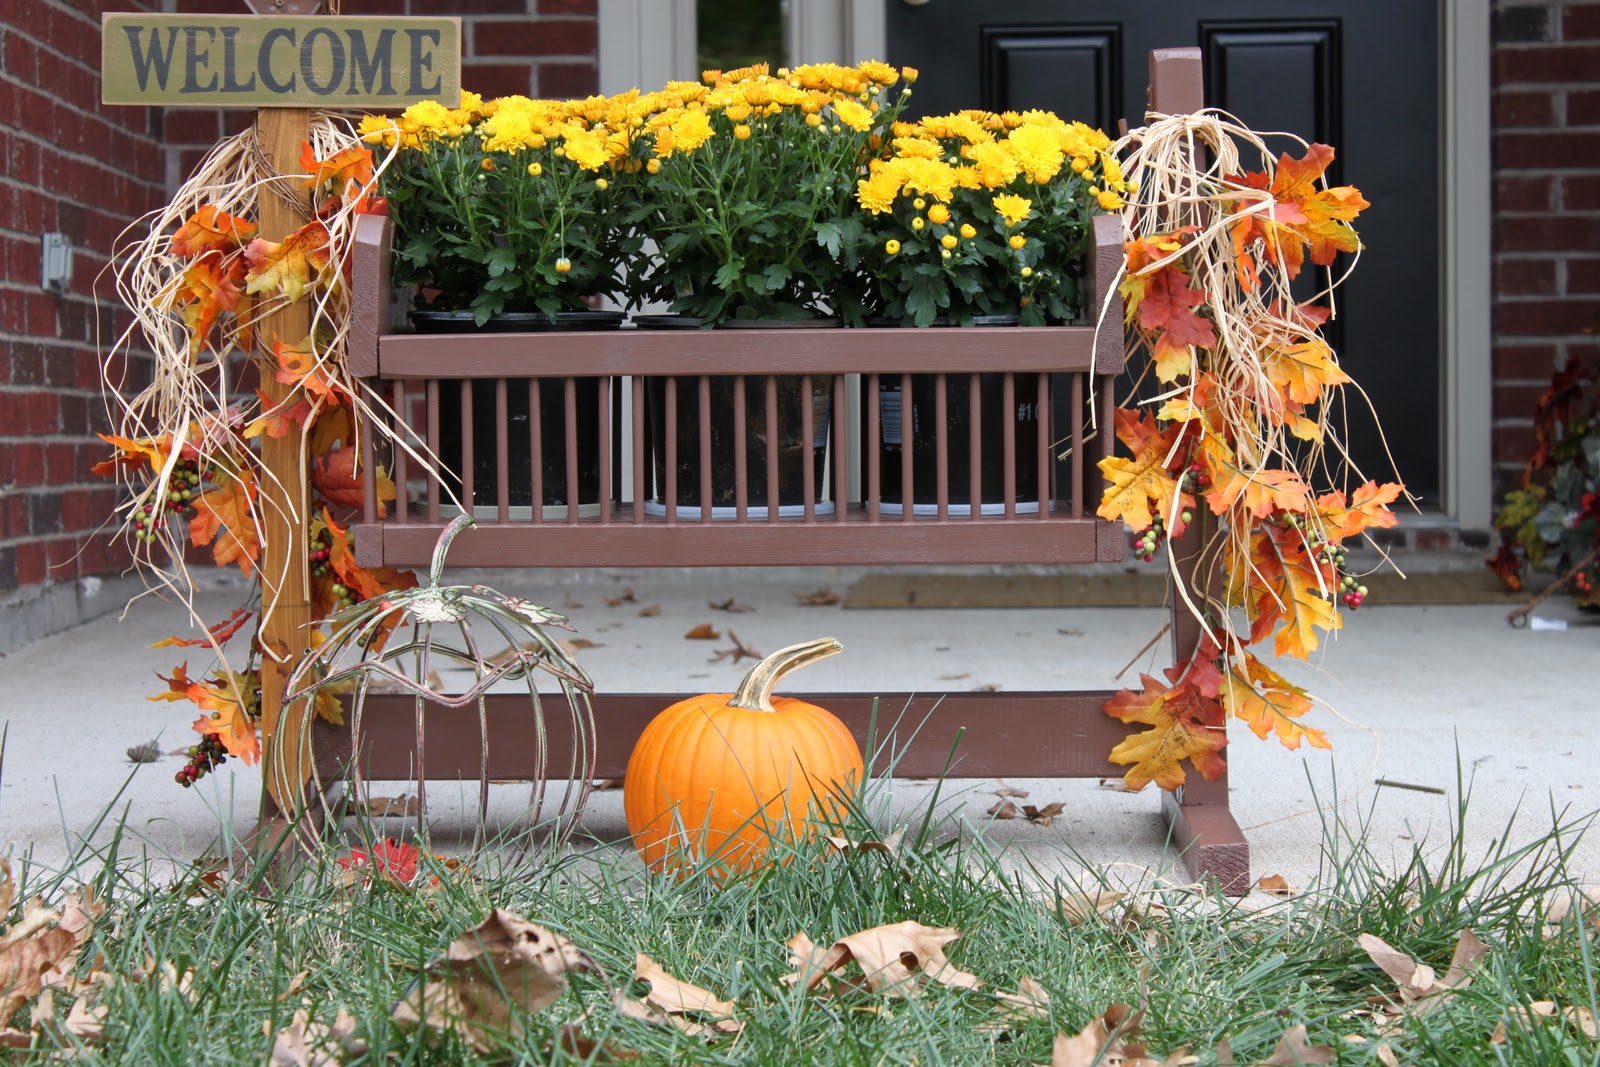
It didn't seem complete so I added a little rake "Welcome" sign to the left side and attached it with floral wire in 3 different place.

While I would like to add more props around my cute little planter, I am stopping for now until I find the next great steal.
It's easy to get stuck in a rut of creating new things. My encouragement is this. Find what you LOVE. Look around at Flea markets and ask yourself how you could re-do something into something really amazing. Pick up a few accessories that go well with it and pull it together with things you might all ready have. You'll be amazed at the end product!
It is the planter I didn't know I was looking for!
Happy creating!

*Linked to 
