Friday, January 14, 2011

Sylver Designs Review

I'm always on the look out for a good baby pattern to crochet something cute!  I found Sylver Designs  on Etsy.com a long time ago but never bought a pattern until we had a snow day recently and I wanted something different to do.  I really enjoyed looking at Sylver's patterns and admired how cute they were.  With so many differnt color options out there you can come up with some pretty cute baby booties and not have one alike!

What I like about Sylver Designs was how quickly I go my pattern.  I think I received it within 3-4 hours after paying for it by paypal.  I was eager to get it and try it out!   So I decided to make a pair of booties for someone I know having a baby soon.  Here is my finished product so you can judge for yourself.

Sylver Designs showed her pattern in two tone but I wanted to make
an all pink one to show how dainty the booties really can be!

A cute flower button makes it look even more precious!
I love that the booties will actually stay on the foot instead of slipping off as the baby moves.  You can make various sizes for different baby ages too which is great!

I definitely rate this pattern a A+!

So go ahead and check out her store at http://www.etsy.com/shop/sylver?ref=pr_shop
You will love what she has to offer!

Tuesday, January 11, 2011

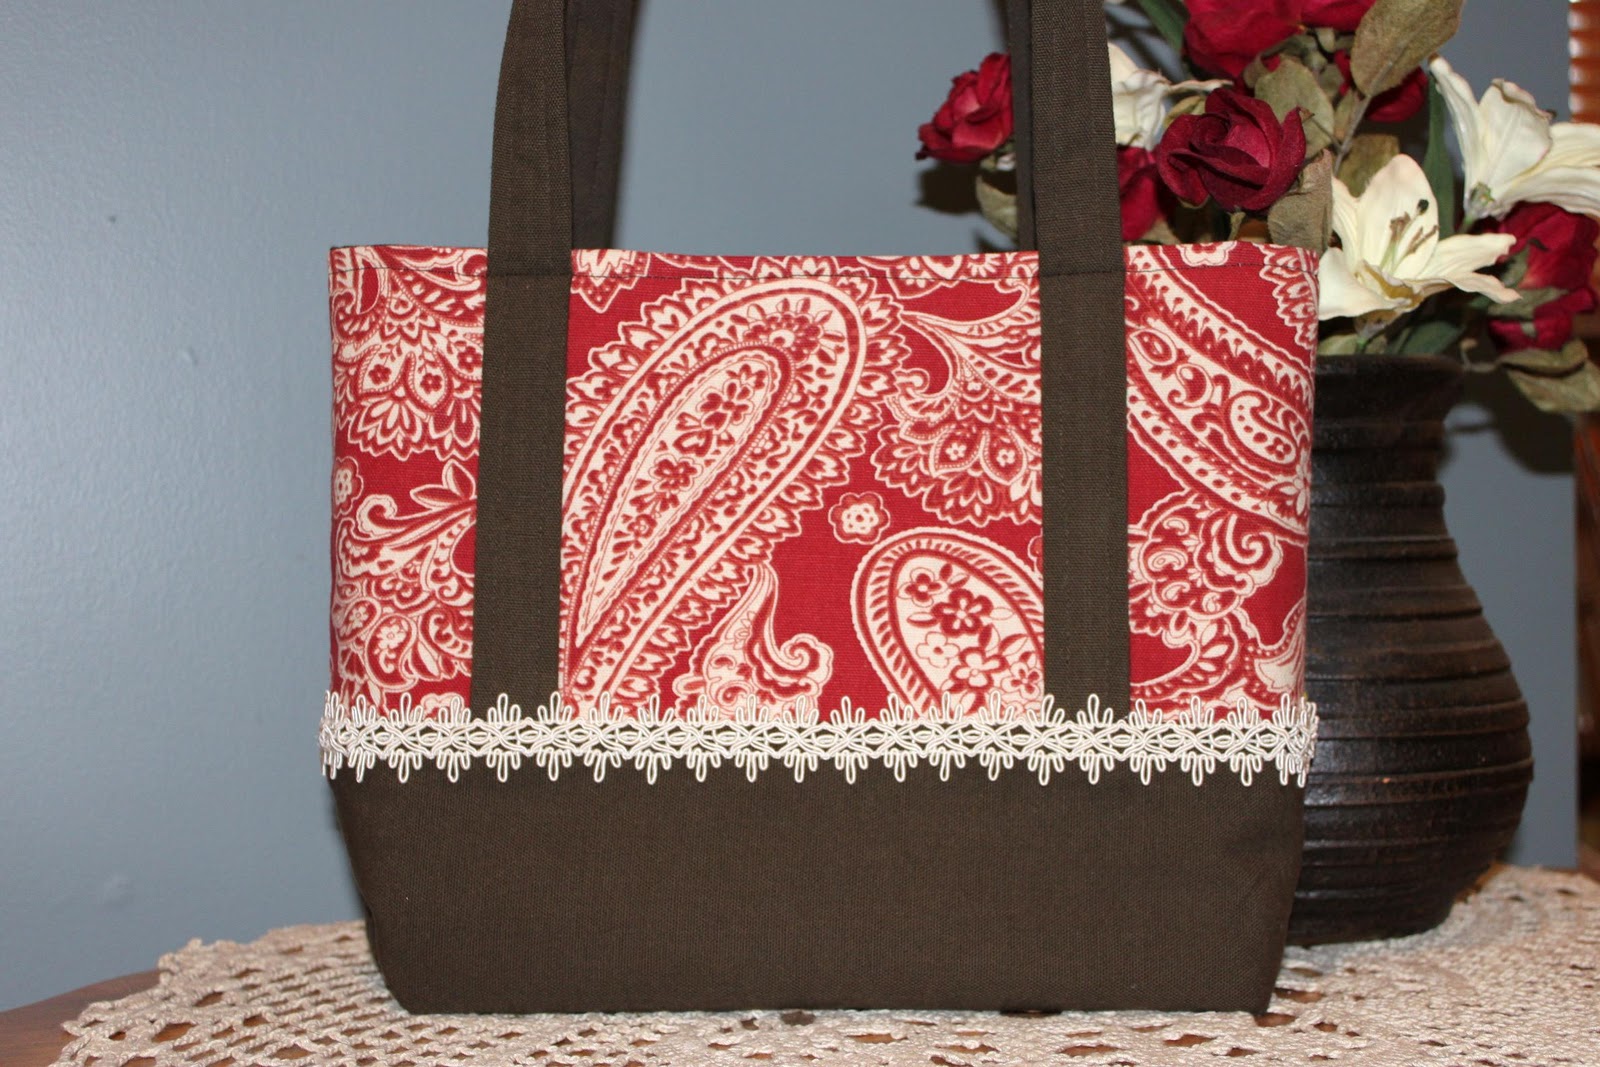
Brown and Red Handbag

Recently I had the opportunity to make a second handbag for a friend of mine.  It's always a little scary making something for someone you know, but I enjoy making the handbags so I gave it a shot.  To find out a little more about what my friend expected, she emailed me a picture of her budget wallet.  You can really find out a lot about people by what they have in their purse, and I absolutely loved seeing her wallet!
Isn't it cute??

It's scary going shopping for fabric not knowing for sure what your customer wants.  To get a better feel of what she was expecting, I asked my friend what main colors she wanted.  She wanted a dark brown and maybe a red rose on the front, and she also mentioned corduroy.  With that in mind and once I saw what she was wanting to match her bag with, it was off to Joann's to find material! 

The fabric I chose was a cotton canvas.  It is more durable then just cotton.  A couple tips in working with cotton canvas:
1.  Sew the cut edges before you pre-wash it and dry it.  It will keep the edges from fraying badly and wasting your material.
2.  Fray check is your friend.  Use it on all cut edges after cutting your pattern pieces out.  It will keep your fabric from fraying in the future.


I know my friend loves red. So I picked up this fabric piece and emailed her a picture to see if she liked the print.  At this point I gave her a couple options in how I could do the bag.
1.  An all brown bag with a red rose.
2.  A brown bag accented with red fabric.


A cream trim piece breaks up the bag colors and adds a feminine touch to the bag.

A pocket on the inside adds a nice touch.
Snap encolsure.

One thing I did differently with this bag was add interfacing to the inside pieces to give the bag more of a shape.

Friday, January 7, 2011

Pure Soap

I don't know if you are like me, but I dread Winter. . .

Why?

'Cause I know that my hands will get so dry that it hurts. 
Even worse when you have little children around. . .
 You are constantly washing your hands every time you change a diaper,
get a snack, get their lunch, or wiping their little noses.

So what should you do?

I decided to try something new this year.  When I went home for Christmas my mother gave me some home-made soap she made.  One rose bar was made with coconut oil and olive oil and the other with avocado and coconut oil.

Before this I never really thought that home made soap could be better then the name brand we normally get.  Actually we use liquid soap for washing our hands, and it is usually the off brand with "aloe" in it.  But who's counting?

I decided to do a test one the soap and try my best to use my mom's soap every time I wash my hands.    The question I had was, "Would it dry my hands out as much as the liquid soap?  What is different about it?"

The difference I am finding after using the soap with olive oil and coconut oil is simply this:

1.  It lathers SOOO much better then regular soap.
2.  My hands are not drying out as much as they normal do.
3.  I am not having to use as much lotion to soften my hands.

So I simply had to ask my mom for the recipe.  She gladly complied.  I have yet to make this.  I just thought the process of soap making was a unique thing to me.  I would love to try this and hope one day I will.

Soap on left made with avocado and coconut oil.
Soap on the right made with coconut oil and olive oil.

Pure Soap
{depending on size of molds this recipe makes 6 rose bars and 1 bar soap}
16 ounces coconut oil
2.9 ounces lye {Sodium Hydroxide}
1/2 cup warm water.

Combine the lye-water and the fat; stir occasionally for one hour and forty minutes.  Add 1/4 cup hot tap water and stir for ten minutes.  Add another 1/4 cup hot tap water and stir until the soap is thick and smooth (a few minutes).

Time in mold:  24 hours
Place the soap in a freezer for 3 hours, then remove it from the molds.

Age: 3 weeks.  Why?  It needs time to age so that it will not burn you when you wash your hands.

You can make many cleaning products from Pure Soap. 
Spray cleanser
laundry powder
soft-scrub cleanser
toilet bowl cleanser
jewelry cleaner

**My mothers additional instructions:
Put newspaper on the area you are working.
Use stainless steel bowl and whip.
DO NOT use aluminum or you will have a very big mess.
Measure water and place in bowl.
Use a digital scale to measure lye and fat.
Pour lye into bowl with the water and stir till dissolved.
Place fat and or oil in next.
Stir fat till it is melted.
You may use other oils or fat but keep the total to 16 oz.

I use 8 oz olive oil and 8 oz coconut oil.  It makes a very good soap.
Also, I make avocado soap using 1.6 oz of avocado oil and the balance coconut oil.
Very important, add the lye into the water and not the other way around.

**Use cider vinegar to clean up or if you get some lye solution on you.

You can find your ingredients at Texas Natural Supply store.

Friday, December 31, 2010

Is Candle Making A Lost Art?


There is just something about candles that bring a warmth to our homes. 

Their scent tickles our nose.... 

The colors add pizazz to our living spaces. 

With so many shapes, sizes, and smells, candles are an affordable way to dress up our homes and show off our home's personality. 

So what do you think of when your see a home made candle?  One of my first memories of candle making takes me back to Silver Dollar City.  I used to love watching their candle makers dip the candles and walked around their shop to admire all the fun shapes they sold.  One of the fun shapes I recall is a Candle Sundae in a glass dish.  It really looked good enough to eat! 

I can't say I know too many people that make their own candles, but I do know at least one person.  My nephew, Caleb, started a candle making business this year and I wanted to make sure I got my hands on one of them.  My past experience with home made candles was disappointing.  I found they didn't have a strong enough scent, but I know my nephew and knew that he would not be in the business if his candles didn't smell just right.  So I decided to buy some from him hoping that I would not be disappointed.  You probably are asking, how did it turn out?  Well, I tested them.  They are perfect.  I am not a person that can handle an over powering scent.  Too strong of a scent makes my allergies flare.  These candles were exactly what I look for when buying candles.

So I decided to help my nephew out and let more people know about him and his product.


As I mentioned before, Caleb is my nephew and is 14 years old.  Caleb started his candle making business September 9, 2010 so that he could earn a little money on the side.  I always like to ask people what they have learned by doing their craft and he said that he has learned how to make votive candles and to get the scent just right.  I think that is a very important part.  No one likes buying a candle that doesn't smell when it is lit.  Caleb also mentioned the most challenging thing he had to learn was how to use the auto wick pins and putting them in just right.  He did a great job doing it.  The tops of the candles are smooth as can be and the centered just perfectly!


So how does he make them?   Here is what he said, "I use a Paraffin Soy Mix Wax, Zinc core wicks, liquid scents and dyes. I measure the wax then I melt it. As it is melting, I prepare the wicks, jars, and molds, scents, and dyes. I then add scents and dyes and stir for three minutes. Next, I pour the wax, add the wick, and let it harden."  It sounds so easy, but I know with any craft a steady hand and attention to detail is very important!


Caleb likes candle making because it is fun to do.  He even got to sell 3 jar candles in a weeks time!  Not bad for starting out!  I know how hard to get a home business going sometimes.   One can wait weeks or months or years before it takes off.  That's why it's important to let people know by word of mouth what you are doing.


I purchased Caleb's Cinnamon Apple Berry in a reddish pink color.  Cinnamon Apple is one of my favorite scents so that is what I ordered when I saw what options I had.  When I brought them home after Christmas, I decided to test it out right away. There are several things I liked about Caleb's candles. 

1.  The vibrant colors are so pretty.  
2.  The scents were strong enough and not overpowering.
3.  After burning the candle, the hot wax was not hot to the touch and would not burn little fingers that might get into them.
4.  You can mix and match your scent to the color.  You could definitely fool someone by having a vanilla scent to a green or reddish-pink color!

All three of those things were important to me and I am a very satisfied customer!

Here are some options for Caleb's Candles:

Scents:
Pomegranate Cider, Mulled Cider, Vanilla Macadamia Nut Coffee, and Cinnamon Apple Berry

Colors:
Reddish-pink, Apple Green, Brown, and Spiced Pumpkin

Price: {does not include shipping and handling}
14 OZ Jar with Candle= $8
2 OZ Candle= $1.30
Candle Votive Jar for 2 OZ candle= $0.75

If you or someone else would like to order a candle, you can contact Caleb by leaving a comment on his blog with your candle choice and address.   Tell them Amy sent you!

http://www.wolfbreath.blogspot.com 


Future Post:  Soap Making

Thursday, December 30, 2010

Hand Bags

The month of December has been a busy blur of activity.  I decided this year to make some gifts for people in my family and was very pleased in how they turned out.  While that was a lot of fun, God had been working on my heart to be more giving of my talents.  So some of the things I created are now in the hands of people I love, kids I teach in Sunday School, and various others that have come into my life.  I feel very blessed to have those people.  As a result, I started having a few people ask me to make them things which is very exciting!  You see at first my craft making was about making an income.  Now I just want to give to others when the opportunity arises.


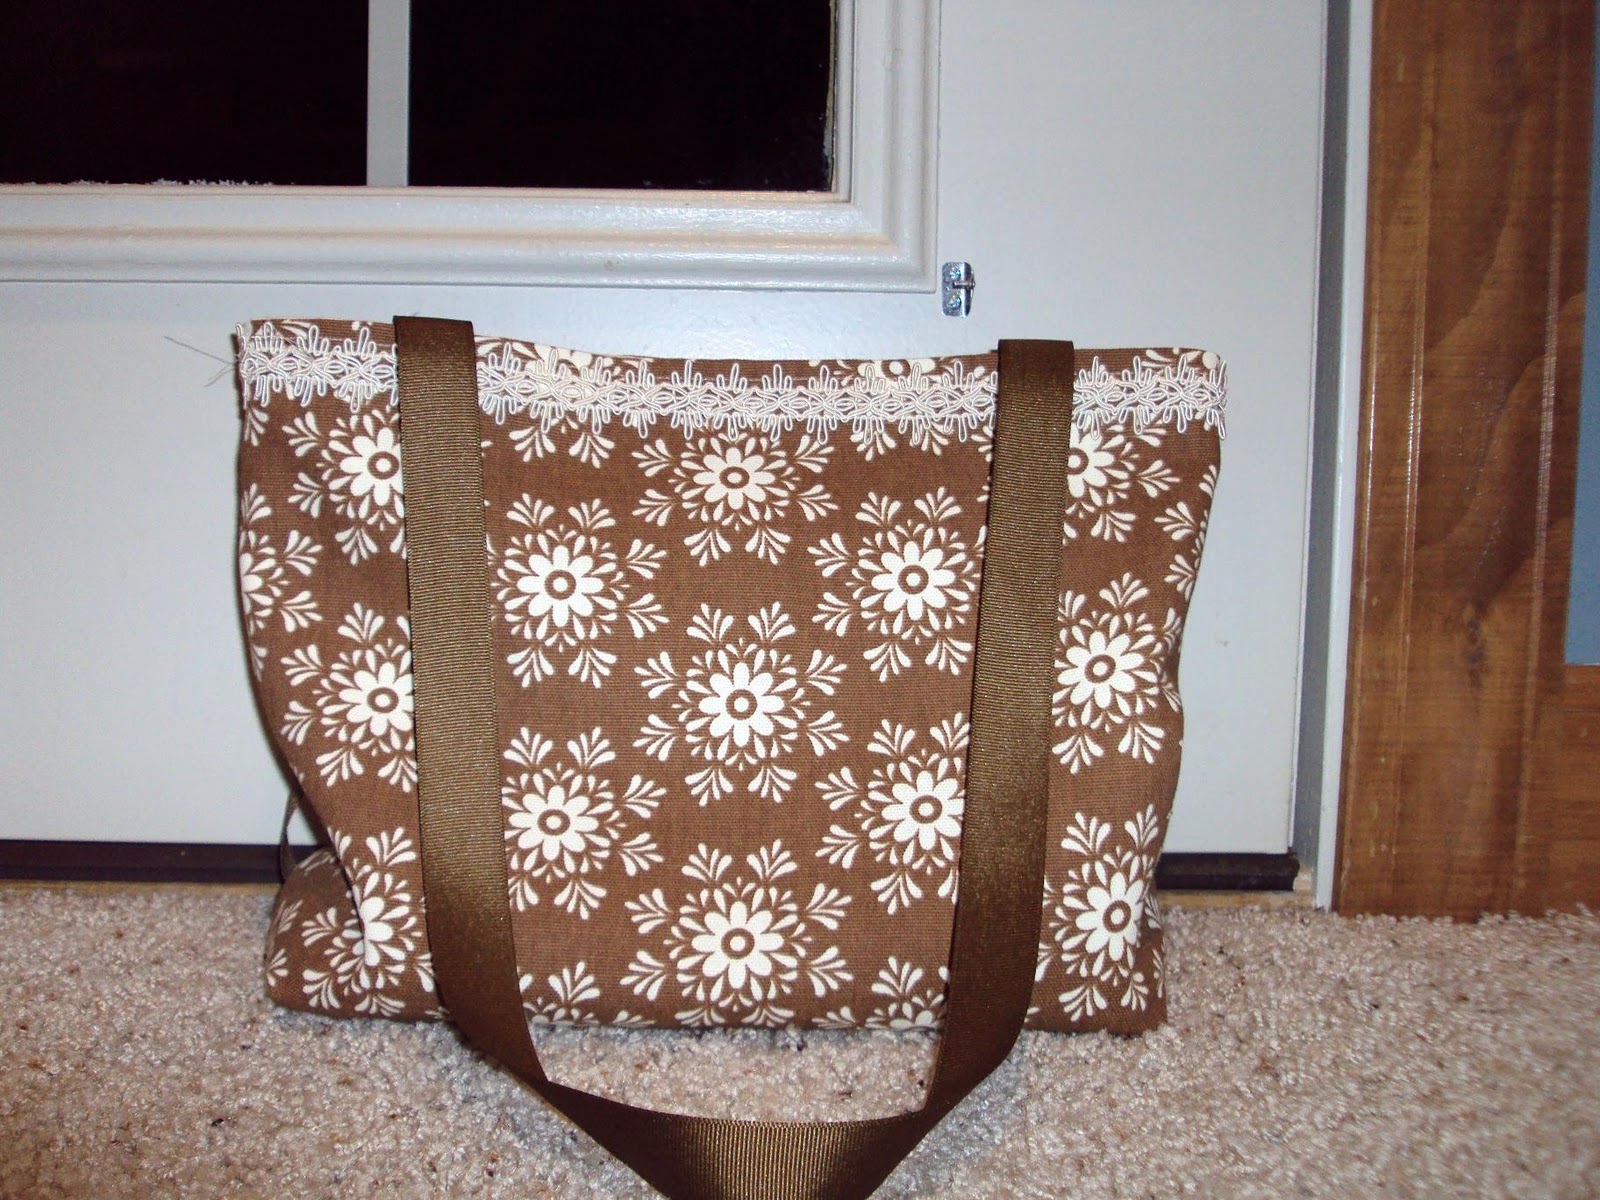
One of the things that I made recently was a hand bag.  My sister asked me to make her one and I joyfully accepted the task.  I knew I wanted to make it bigger then the girls hand bag, so I finally decided that a 15" X 12" square would make a nice sized purse. 

Next was finding the right colors for her.  She mentioned she wanted neutral colors, rust or green or cream or yellow.  After asking my sister several questions about colors, color tones and emailing color options, I felt pretty certain I knew what she wanted.  The above fabric swatch is what we ultimately decided on.


I created an inside pocket and included a snap to close the top of the bag.


Almost done!  I emailed my sister this picture, but did not show her the final product.
Instead I emailed my nieces and showed them the final picture to make sure that it would be something my sister would like.


I squared off the end of the bag so it would sit nicely on the table.


I used 28" grosgrain ribbon for the handles and added a delicate trim to the top edge of the bag.

So what did my sister think?  She loved it.  Especially the trim.  I knew I had nailed that one because I have seen some of the things she had in her house and new that this was perfect. 


Tuesday, December 7, 2010

Langley Metal Works Showcase


Recently I read an article about supporting your local businesses this year for Christmas.  While I love to do that, I usually don't find out about neat shops that not well known.  Today I wanted to give a shout out for a small business that deserves to be found.  My husband, Patrick, was recently looking for a gift idea for "someone" and found this unique shop.  Best part is... they were a local company that not too many people know about.  Or at least we didn't and some of the people Patrick works with didn't either.  I wanted to tell everyone about it because they have resonable cost items for someone that is looking for a unique gift.  They have a shop on etsy, http://www.etsy.com/shop/langleymetalworks?ref=pr_profile and also a personal web-site.  We purchased the above metal sign for $30 and just got it today.  The turn around time on this item was quick!  It is fabulous!  Go ahead and visit their personal web-site at http://langleymetalworks.com/mizzou-shop.html.  Let me know what you think.  Here is the picture of the finished product and we are thrilled with it!


Sunday, December 5, 2010

Potato Chip Scarf in Sea Mist


If you have been out shopping for Christmas all ready, it seems that I have noticed ruffles making a come back. I have seen some really cute shirts with ruffles that are just adorable, but I wasn't for sure if it would look "oh so cute" on me. Then I found a cute pattern from Lion Brand. I have used Lion Brand for some of my patterns and I love looking for new and unique gift ideas. Plus they are FREE patterns and who doesn't love that?!

The pattern I found is a Potato Chip scarf. I have seen some and was not for sure if I would like them, but I decided to go ahead and make one with some yarn I have. Can I tell you, I adore it? They are so fun to make but so cute too! If you love to crochet, these are so easy to do and doesn't take a lot of time. Plus there are some gorgeous yarn colors out there right now and you can make one for each outfit you have.... if you have that much time...


If you are cold natured like me, I would wear a scarf at work around my neck all day.  It kept me so much warmer! What I also like about a Potato Chip Scarf is that it can dress up your shirts and sweaters.  It's not just a scarf to wear with your coat anymore!
I'm thinking about making some for my Etsy store, but I have some other things I need to do first.
Let me know if you would like one. Just tell me what color you are looking for.
Price per scarf would be around $12 each plus shipping.